Showing posts with label bread. Show all posts

Wednesday, June 6, 2018

2-acetyl 1-pyrolline

Do you love Thai food?

Do you love fresh bread?

Do you love basmati or jasmine rice?


If so, you're in love with this particular molecule.

It amplifies itself in both Indian and Thai culture with their love of jasmine blossoms and pandanus leaves — both of which have the above molecule as a dominant fragrance — and which are added to rice to amp up the already existing fragrance.

Sanskrit literature has a tendency to have lovers' meetings beneath jasmine trees. The majority of Indian miniature paintings in the "romantic lovers' mode" feature jasmine trees. Even today, jasmine is the dominant flower for weddings in India.

Clearly in the modern parlance, 2-acetyl 1-pyrolline, you got game!

Saturday, March 25, 2017

Pav Bhaji

What do the laws of electromagnetism, the Portuguese, the price of cotton, time zones, vegetarianism, and the American Civil War all have in common?

They came together to invent the iconic Mumbai street dish known as pav bhaji (pronounced: paav bhaaji — the two "a"'s are actually long vowels.)

Every good military general would tell you that the best way to win a war is through economics. The naval Union Blockade of April 1861 which heavily targeted New Orleans (Louisiana) and Mobile (Alabama) made the cotton exports of the South come to a grinding halt. The savvy Gujarati speculators of the old Cotton Exchange in Bombay knew the drill. Rates were wired in and orders wired out late into the night when the corresponding exchanges in Chicago would've been open.

(Bombay made its fortune on the basis of its cotton mills — a fact that is quite clear even today in its geography. The point being that the price of cotton mattered hugely and the American Civil War and the telegraph provided a mechanism to speculate on the price swings. Note that the world was on a Gold Standard back then so that exchange rates between the dollar, the pound and the rupee, which was basically the pound, would not matter.)

The word for trader in both Hindi and Gujarati is dalal (दलाल) — it's not a neutral word. It has a slightly shady connotation to it. No trader would self-describe themselves as a dalal even though that's exactly what they are. It carries with it the negative connotations of both "speculator" and "pimp". The Japanese equivalent is kabuya (株屋) — stock-broker/stock-slinger (= speculator.)

Now you have a bunch of traders working hard into the deep night. They're largely vegetarian. They're rich (or wanna-be rich) but in the classic tradition of rich people, they're also cheap. When you have a demand, a corresponding supply opens up. It has to be fast, tasty, and yes, cheap.

Where do the Portuguese come in?

India had no tradition of baking leavened breads before the 15th-century just like most of Southeast Asia. The Portuguese were responsible for introducing the yeasty bread (pão in Portuguese) which is paav in Hindi and パン (pan in Japanese).

The dish is made from the cheapest of ingredients — potatoes, tomatoes and onions. Plus fried bread. It's a street dish. It's not fancy. You toss in whatever vegetables you have lying around. It's also infinitely configurable with different toppings depending on the individual taste buds.

The critical point is that everything could be made ahead of time. You're basically stir-frying at the last moment. Even the bread could be made ahead of time. It could even be slightly stale because it would be fried again. Every corner that could be possibly cut was actually trimmed. This is one efficient caloric machine.

Needless to say, it was an instant hit.

Nothing's changed since 1861. This dish is still a hit and will continue to be so.

It's endlessly addictive. It's one carb-laden umami-laden butter-laden bomb!


Ingredients

(serves 4)

6 small potatoes (or 3 large ones)
8-10 tomatoes

1 large onion (finely chopped)
1" ginger
4-5 cloves garlic

butter
salt

3-4 tbsp pav bhaji masala

chopped vegetables (peas, carrots, cauliflower, french beans — optional)

12-16 pieces pav

Toppings

red onions (finely chopped)
lime
cilantro (finely chopped)

Note 1: Some of the toppings are missing in the photograph. Specifically, the red onions with lime and cilantro. (The toppings are frequently mixed together so you just add as much as you like including the lime juice.)

Note 2: The CC knows that the bread in the picture is not fried. As Julia says, butter makes everything better, but sometimes a little restraint also works. (People also add extra butter on the bhaji itself which is kinda "over the top".)

Note 3: Yeah, the CC is totally aware that the picture below isn't the "real" paav but one must work with what one has in New York not what one wishes one had. It's the closest approximation to the "real thing". The bread pictured above has the right texture — hard exterior and soft interior. It's from a local bakery.

Note 4: For once, the CC is not going to post a recipe for the spices. You are better off buying this at a Indian grocery store. You could do it yourself but the proportions would be all off unless you plan on making a year's supply. Sorry.

Note 5: Note the presence of two different kinds of sourness — amchur (= dried green mango powder) in the pav bhaji masala and lime juice. This is a consistent theme in Southeast Asian cooking. The presence of a dry "mellow" kind of sourness allied with a wet perfumed "fresh" kind of sourness.

Note 6: The CC knows that it's much more tricky to describe a street dish than it is to describe a more conventional one. However, when you are faced with alternatives and problems, the key question you need to ask yourself is "Would a street vendor in 1861 worry about this problem in the middle of the night?" If the answer is no, then the CC says, "Wing it!" Except for the butter, the spice mixture, onions, potatoes and tomatoes, it's all up in the air anyway!

Note 7: If you've ever watched it being made on the street, you'd realize that your puny home cooking range simply doesn't have the BTU's. Additionally, the tomatoes are simply not ripe enough. They toss whole ripe tomatoes onto the sizzling skillet and de-skin them with their spatula. You have neither the heat nor the skill to do so. Do it the CC's way, OK?

Note 8: The vegetables may or may not have been part of the original recipe but they've become "traditional" with the advent of healthier eating.

Recipe

First boil the potatoes. Skin them and set aside. Mash gently.

Pass the tomatoes through a food mill to get just the pulp. If the tomatoes are not completely ripe, you may need to par-boil them for 5-6 minutes each to get them to soften.

Pound the ginger and garlic into a paste.

Heat up the butter in a pan. Add the onions and fry till they turn pink. Do not let them caramelize. Add the ginger-garlic paste and fry for a bit. Add the tomatoes and let it come to a boil. Skim if you prefer that. Let it cook for at least 10 minutes. Add the pav bhaji masala.

Add the mashed potatoes and let it cook for 8 minutes or so. This concoction has a tendency to act like molten lava splashing everywhere so cover the lid partially otherwise you will be cursing the CC.

Taste. You may need to add more pav bhaji masala. It's hard to predict how much exactly.

Split the bread into two without cutting all the way. Take a skillet. Add butter and let the bread fry on both sides. (This is optional.)

Serve the bread, the pav bhaji and the toppings on the side (as needed.)

Tuesday, November 10, 2015

Roasted Marrow Bones with Parsley Salad

The CC has been craving to make this recipe ever since he ate it at a restaurant a few years ago. It took a while to source the marrow bones and a little longer for the weather to get cold enough to make it.

The recipe is based on one that Fergus Henderson re-popularized. It's a complete classic and deserves to be so. It's also completely straightforward and will make your cooking seem fancier than it is if you serve it at a dinner party. (If you scarf it down by yourself, which you very well might, this blog is a judgment-free zone.)

The killer step is the combination of the French way of serving (with fleur de sel) and the English way of serving (with a tart parsley salad) both on toasted crusty bread. The English and the French ways are fairly related since La Manche is not very wide and the Norman Invasion is now more than a millenium old.

Ingredients

(serves 4)

Marrow Bones

8 marrow bones

Parsley Salad

3 cups parsley leaves
1 large shallot (sliced into paper-thin quarter-rings)
2 tbsp salt-preserved capers (de-salted, chopped)

1 tbsp champagne vinegar
2 tbsp olive oil
1 tsp mustard

black pepper (lots!)

fleur de sel (to serve)
toasted crusty bread (4-6 per serving)

Notes

[1] It's very rich so a little goes a long way. Two bones each per serving works very well although three each with some extra toast would make a nutritious complete meal.

[2] The salad is best assembled at the last minute and it needs to be tarter than the usual salad so go with a 1:2 ratio of vinegar to olive oil rather than the traditional 1:3.

[3] The capers need to be preserved in salt not vinegar.

[4] The tiniest dab of mustard actually gives a faint background taste that is really great.

[5] The CC rebelled against the original recipe which finely dices the shallots. Extremely fine quarter-rings give it a much more refined texture which contrasts the salad against the rich creamy marrow.

[6] The first step in the recipe is entirely optional. It's very chef-y and it is aesthetic in nature not functional. Skip it if necessary.

[7] The timing of this recipe crucially depends on whether you start with thawed bones prepped or frozen bones. The times and the size of the bones matter greatly. Chez CC, we serve as they get ready, the sizzling bones are always coming out on time. Sharing works wonders.

Recipe

If you are going to prep the bones, dump them with ice into a bowl with two tablespoons of salt and cover with cold water. Every three hours, drain the water which will be bloody and repeat the process. Four times and you will have immaculate white bones and there will be no more blood in the water. This step is really aesthetic. You can roast the frozen bones directly. The blood will turn black when roasted. (Chefs are control-freaks about precision so this step really helps because the bones are now thawed and can be controlled precisely.)

Preheat the oven to 450°F.

Make the toast and set aside. Slice a baguette on the bias and let it toast in the oven. Depending on the slice size, it should be 4-5 minutes.

Clean the bones and make sure they are absolutely dry. If they are short you can put them vertically, with the flat sized down. Otherwise lay them horizontally. Don't sweat this.

Roast in the oven for 25 minutes. It will take 45 minutes if they are frozen. The marrow will be quivering like jelly and slightly puffy when it's done.

Meanwhile, assemble the parsley salad. Make the vinaigrette. Toss the salad.

Serve the roasted marrow bones with the parsley salad, toast and fleur de sel on the side. Eating is a matter of topping the toast with whatever combination your heart desires.

Saturday, October 24, 2015

Scotch Woodcock

The CC has long maintained that if one wants to have an appreciation for English food, one must look to the period before the Great War (World War I) which destroyed the aristocracy.

Here's a very old recipe with a strange name. However, it's perfectly at ease today in the age of umami even if the 19th century lords wouldn't have heard of the word or the concept.

The recipe is truly spectacular at many many different levels. It's umami-laden which makes it irresistible; it's nutritious and attractive to look it, it has a variety of textures that makes eating it a sheer delight and it's breakfast!

Like all aristocratic recipes, it's a little bit time-consuming (although not as much as you think thanks to modern-day devices and conveniences.)

What is it?

It's excellent bread (or sometimes toast) that's lavishly spread with anchovy butter on which are piled soft scrambled eggs (made with cream) on which are piled more anchovies and assorted herbs.

It's relatively free-form when it comes to the herbs. English cooking was fairly easy-going with the herbs even back in the day. It could be chives or parsley or even salted capers. Seasonality and all that.

What really makes the clock tick, as they say, is the anchovies. The umami is the rock star and for that you must make the anchovy butter but it's straightforward with a mortar and pestle and a refrigerator — spare some pity for the poor sod that had to churn the mixture with ice to get it "to set" before refrigeration.

The CC's favorite part is that the anchovy butter is called "Gentleman's Relish". Now there's a term the CC could get behind.

Ingredients

Anchovy Butter

4 anchovies
8 tbsp butter

Scrambled Eggs (per serving)

2 eggs
2 tbsp cream
salt
pepper

Misc (per serving)

1 slice rye bread
1 anchovy (neatly separated into two fillets)
minced herbs (parsley OR chives OR capers)

Recipe

Note: This recipe is quite salty from the anchovies. Don't add too much salt in the eggs.

Anchovy Butter

First, make the butter. This is best done ahead of time. Pull the butter out of the fridge and let it soften. Fillet the anchovies, wash to get rid of the extra salt and pound to a paste. When the butter is softened, whip it with a fork till soft (called: "creaming the butter") and fold the anchovy paste in to make a compound butter.

You can take this and make a torchon with some plastic wrap if you want to get fancy, or just put it in a ramekin, cover it with some wrap and place it in the fridge.

This is best done ahead of time. This stuff lasts a long time even though the CC will personally assure you that you will plow through it in no time.

Scrambled Eggs

For the scrambled eggs, mix the eggs with the cream, salt and pepper. Scramble them over high heat so that the curds are relatively large and dry. (This is in distinct difference to the French-style of scrambling eggs which is over low heat where the eggs are soft and creamy and have almost no curds.)

Set aside.

Assembly

Spread anchovy butter over the bread. Pile some of the scrambled eggs on top of it. Put two of the half-anchovy fillets in an X over them. Sprinkle with the herbs and serve.

Saturday, October 20, 2012

Improptu Dinner Party

Shishito Peppers with Sea Salt
♦
Zebra Tomatoes with Arbequina Olive Oil and Sea Salt
♦
Autumn Mac-n-Cheese with Vegetables
♦
Cheese Course (with Duck-Fat Ciabatta)
♦
Chocolate

Saturday, September 15, 2012

Panzanella

Been craving it for a month. Finally got it.

The CC is in a tomato-haze.

Cucina di povera never goes wrong when the cravings hit.

Saturday, October 22, 2011

Bibingka

Rice cake made with fermented rice flour and coconut milk. It's very slightly sweet with a smoky flavor. It's baked in a banana leaf, and is best experienced literally out of the charcoal oven.

Wednesday, March 30, 2011

Cooking Myths (Part 3)

Another cooking myth is that bread is done when you pull it out of the oven.

As any good baker would know this is patently false.

This is a simple consequence of the classical heat equation (bet you weren't counting on partial differential equations showing up on this blog, huh?)

Heat flows from stuff of higher temperature to that of lower temperature.

In the oven, heat flows into the bread because the oven is hotter than the dough.

As you pull the bread out of the oven, the heat starts flowing out of the bread into the ambient air. Frequently, the very center of the bread may be cooler than its surroundings, and heat will keep flowing towards it as well. Consequently, the bread is still "cooking", and experienced bakers know to hold themselves away until the bread equalizes with the temperature outside.

Experienced bakers know that good bread will "crackle" as it cools down. The bread is contracting from being cooled and the strands of gluten are snapping as the bread contracts. Which releases even more aromatic molecules of smell.

That's what makes fresh bread irresistible but you must resist for a while before the bread has cooled down. (Otherwise, you get to eat a lumpy doughy mess.)

It's one of the sad truths of life — instantaneous gratification is a very bad thing in the world of fresh bread!

Monday, March 21, 2011

Baking Resumption

After a long hiatus, the CC has started baking again.

This is Jim Lahey's famous (infamous?) No-Knead Bread, and yes, it's exactly as amazing at it always was.

Saturday, October 23, 2010

Pizza

It's a bit surprising that this recipe never made its way to the blog.

The simple explanation is that this is a well-oiled machine that is pre-blogger phase.

This was the most requested (and delivered) recipe in the CC's wild youth. Many pies were made and consumed with suitable libations all around (champagne! martinis!) and much merriment was made with all and sundry for very little cost.

Rewind the clock, and once upon a time, the CC used to be a serious bread person. Natural fermentation, mid-night feedings, the whole nine yards. That's all very wonderful, and mind you, it does lead to spectacular bread, but why bother when the bakery literally a block away can do it for you? (That's New York, my friends!)

This recipe adopts the best of both worlds. Dried yeast (= convenience) but the slow development of flavor that comes from natural fermentation. It works perfectly for parties because you can make it in the morning, and it will be ready in the evening.

Standard dried yeast (saccharomyces cerevisiae) has been bred for exactly one purpose. Fast fermentation.

Live fast, die young.

That's what dried yeast does. Reproduce a lot. Minus the cocaine and the parties. Alas, they also happen to be asexual! Sucks to be them.

The problem with this fast fermentation is while it does make the dough rise quickly, it does not allow it to gain the complexity that it would have if the yeast could chow down on the sugars present in the flour.

The trick is straightforward. Use very little of the dry yeast, and further retard the fermentation process by lowering the temperature. We are undoing what the marketeers want in the interest of taste!

There's a second trick that most ol'-school bakers know. It's called rye flour. Rye flour is the crack-cocaine of the yeast world. They love it (= high sugar content.) They chow down, go nuts and reproduce like crazy.

In this case, the idea is very simple. First make a poolish (slurry of rye flour, yeast, and water.) Let the yeast go completely crazy. Then mix in the regular flour, and stick it in the fridge.

The first two steps are the trick to the amazingness that is this recipe. Do not skip them under any circumstances!

Incidentally, for all you lovers of convenience, this recipe works perfectly well if you skip the retardation process. You will just not get the complexity of taste though.

Thirdly, you need a pizza stone. There's no need to buy a fancy one. Just get some unglazed tiles and stick them in the oven. The reason is very simple. Air has barely any thermal capacity (ability to hold heat.) The oven is filled with air. You need something in there that can hold heat. The ideal objects are things that are impossible to heat (= stone.) They take forever to heat precisely because they have a huge capacity to hold heat.

The CC has the stone permanently in his oven. It works magnificently in holding heat. Everything from mac-n-cheese to braised lamb is helped on its way by the stone.

Fourth, the CC is going to give a caveat. This is a recipe with flour that has a very high "hydration quotient". That means the dough is quite close to being liquid. There's a lot of water in there. Working with dough with a high hydration quotient is quite hard. It requires some experience. The CC has had more than his share of "legendary disasters" with breads that have high HQ's. If you are a newbie, just use less water. You will find it easier and you will have great results anyway (with a completely different pizza texture though!)

Fifth, the CC will not talk about the toppings but he will give a warning. In order to be successful, the toppings have to be reasonably dry. Which means that if you plan to use veggies (onions, peppers, mushrooms), then you must at the very least dry sautée them on a skillet to get the moisture out.

Even a tomato "sauce" must be on the dry side for this to work.

Finally, this is not a Neapolitan pizza. The dough is totally different. In order to be from "Napoli", you need far less hydration and a totally different flour, and a goddamn wood-burning oven (good luck!)

Better to abide by the golden rule: There are many pizzas in the CC's house.

Also, for all you control-freaks, when the dough is this wet, it's near impossible to control the shape. Yes, the pizza will be roughly round, more likely elliptical, or even like the map of Italy. Just enjoy it.

Buon appetito!


Ingredients

Starter

2 tsp yeast
2/3 cup rye flour
4 oz water

Dough

2 tbsp olive oil
1 tbsp Maldon sea salt
1 2/3 cups white flour
5 oz water

Recipe

Mix all the starter ingredients together to a starter dough. It should be like sludge. Let it sit for at least 30 minutes. At the end of this, it should be bubbling. If not, your yeast are dead. Bail out.

Mix the rest of the stuff. Add water till you have a sticky dough. You can just use a mixing spoon to mix it. It's quite wet and sticky. Kinda like a runny clay. There will be a light sheen on the surface.

Stick it in the fridge till 5 hours before you are ready to eat.

The dough will have ballooned. Deflate it with a ladle. You will notice it has changed in consistency completely. The dough will be a lot more "dough"-like, the stickiness will be "flowy" rather than "clumpy". There should be a strong sheen on the surface, and a great yeasty smell.

(This yeasty smell is why this pizza goes great with champagne. Ahem!)

Pre-heat the oven to 475°F for at least an hour while the dough rises.

Assemble the pizza dough with a lot of flour on a pizza peel. Assemble the toppings as required. Slide the pizza onto the stone (this requires some back-and-forth motion practice.)

The last piece is the hard part. For beginners, the CC recommends corn-meal rather than flour because it helps the sliding part. Also, ignore the toppings initially, get the pie in there and a few minutes later, top the pizza while it is structurally intact.

Bake for 12-13 minutes.

You'll never go out for pizza again!

Saturday, April 17, 2010

Brunch

There is only one rule for scrambled eggs. Extremely low heat (and the CC does mean "extremely"!)

Do it over a double-boiler (pot heated by simmering water underneath) just for practice, and you'll get the hang of it.

Creamy, meltingly creamy. That's all there is to say.


Salad, prosciutto di parma, scrambled eggs, Turkish pide

Tuesday, January 5, 2010

Cheese & Spinach Strata

This is an excellent dinner (with a green salad.)

And it's even better the next day at room temperature.


(Source: Smitten Kitchen.)

Friday, December 25, 2009

The Bread Child

パン = pan = bread (from the Portuguese)
子 = ko = child

パン粉 = panko = child of bread = breadcrumbs

Quite Christmas-sy, isn't it?

Friday, December 12, 2008

Breadcrumbs

The CC cannot believe that he is writing a blog entry on this subject but given that the culinary arts reach new lows daily, this is a much needed rant.

Good breadcrumbs are necessary for many dishes.

What makes them good? Well, if you don't like to eat them as is, they are not good. It's as simple as that. They should also preferably be relatively uniform in size (although opinions differ on this subject for a good reason.)

So what's the solution you ask?

Find a nearby baker that makes "naturally-leavened" bread. Most of y'all in urban or semi-urban areas should have no trouble finding one. Get a baguette or a ciabatta, cut it up, and let the pieces dry out for 4-5 days. The pieces will be hard as rocks when they are done. (If they are thinly sliced, they will dry faster.)

There is complex science involved in why this works only with "naturally-leavened" stuff but that's for another post.

Grind the stuff using a food processor, and sieve it. The last crumbs should be passed through a coffee grinder (which grinds finer) and sieved again. (The CC needs to wear earplugs for both steps because it is so loud.)

The stuff will store indefinitely in a tight container. Yeah, you heard that right. Indefinitely.

You will never go back to the commercial crap again.

Is this so hard?

Friday, September 19, 2008

Panzanella

The Italian "bread salad" redolent of poverty, and yet so delicious that the CC challenges any and all of you not to gobble up every morsel, and lick your plates.

For the record, you need "true" sourdough that has gone stale (= dried out completely.) These staled-out breads have very long shelf-lives and will not grow moldy (for reasons to be explained in a future post.)

Ingredients

staled cubed bread
4 tomatoes (as ripe as can be, diced)
1 large red onion (diced)
2 cloves garlic (minced fine)

6-8 tbsp capers (preserved in salt, soaked to remove salt)
anchovies (preserved in salt only if you have them.)

red-wine vinaigrette
sea salt
black pepper

lots of chiffonaded basil

Recipe

Salt the tomatoes; they will let out copious mixture. Separate and whip the liquid with the vinaigrette.

Mix everything together, and chill for just a tad. The bread should be both soaked in the liquid and crunchy.

Texture is as important as anything else.

Wednesday, March 26, 2008

Fusion

A baguette slathered with cilantro chutney, and lined with paper-thin slices of tomatoes and parmigiano-reggiano.
We leave the "purists" to their niggling nitpicking nickelfuckery.

Sunday, March 16, 2008

Words of Wisdom

When making sourdough (or sourdough brethren like idli, etc.), you need to put them in large bowls with lots of space so that the stuff doesn't overflow and make a huge mess, and you start your day by cleaning a mess.

Learn, wise people, from the foolishness of the CC!

Thursday, January 10, 2008

Tunisian Spiced Barley Bread

Rustic in origin, this is not a bread meant to be eaten alone but rather more like a rusk used to flavor or thicken a soup/stew. Served crumbled into the most modest of modest soups, this bread elevates the complexity level thanks to the rich flavoring of the barley, caraway and fennel.

This particular recipe also illustrates the very Tunisian trait of making something, and then tearing it up to use the pieces to make something anew.

Also, since traditionally ovens were a luxury, if you find yourself without one, just toast the dough over a dry skillet on both sides.

Ingredients

1 tsp yeast
1 tbsp brown sugar
1 1/4 cup barley flour (substitute with "millet flour")
1 cup fine semolina flour
1 tbsp caraway seeds
1 tbsp fennel seeds
2 tbsp salt
olive oil

Recipe

Start with the dry yeast and the sugar, and some warm water (not hot water!)

After 15 mins, the mixture should start bubbling telling you that the yeast are alive.

Add the barley flour, semolina flour, salt, caraway and fennel seeds (all seen.) Add water a small amount at a time, and knead to a ball of dough. The dough will be soft but pliable.

Add a tablespoon of olive oil and rotate the dough to cover it all over. Cover it with a plastic sheet and let it rise for at least 2 hours.

The dough after two hours.

Lay the dough on a piece of foil, and flatten gently with your fingertips till you get a flat round. Preheat the oven to 425F and let the dough sit for at least another 30 minutes while the oven heats. Score the dough with a knife as shown so that you can break it along those lines.

Bake the bread for 30 minutes. Here's the final outcome. Break the bread along the scored lines.

The Spiced Flatbread

Sunday, December 3, 2006

The "No-Knead" Bread : An Update

So the CC has been making this bread on a fairly regular basis, and has a few comments to share.

Firstly, this bread is very forgiving in terms of quantities, timings, etc. Traditionally, baking is not known for being forgiving. It's the perfect sport for the "anal-retentive control-freak" types (except that "rises" are outside their control so they make up for it by trying to control everything else.)

If you've never handled truly slack dough before, I still urge you to try this one out. The results are so consistently spectacular that it's hard to believe. Even my failures are really good, and the CC is getting very used to even slacker dough than this recipe. (Yes, ladies and gentlemen, the CC is still learning on the job.)

If you've never made bread before, please realize that the "cooling down" is part of the process, and it may not be hurried. The bread is still "baking" on the rack as it cools down. In fact, if you've made the bread well, you should hear wonderful crackling sounds (that can be quite loud) while the bread cools down.

The CC is aware that the temptation of cutting it too soon is always going to be with us, but patience pays off.

Happy baking!

Tuesday, November 21, 2006

No-Knead Bread (from the NYT)

The CC is not in the habit of other people's recipes verbatim, but this thing is so fucking amazing that you might as well blow out the CC's brains with a 2x4.

The internet forums have been buzzing about this for the last week or so. You might've thought that Elvis was making a reappearance or something from the buzz that this thing got.

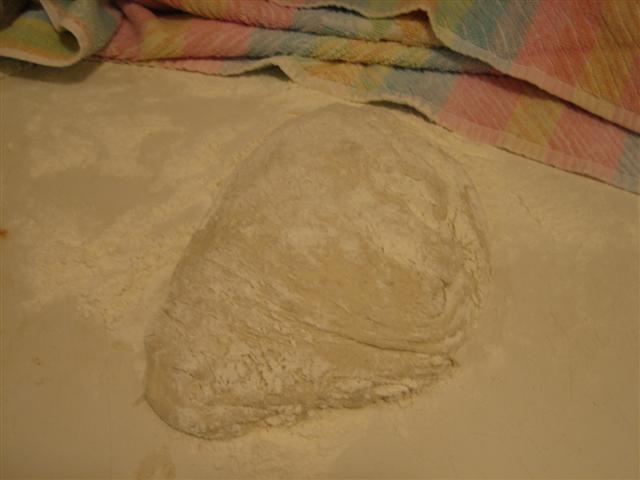
Warning: this dough is absurdly slack (roughly 72% baker's hydration,) so you need a little bit of experience working with this kinda dough. However, this recipe is so fool-proof (rare in the bread world!) that you can hardly go wrong.

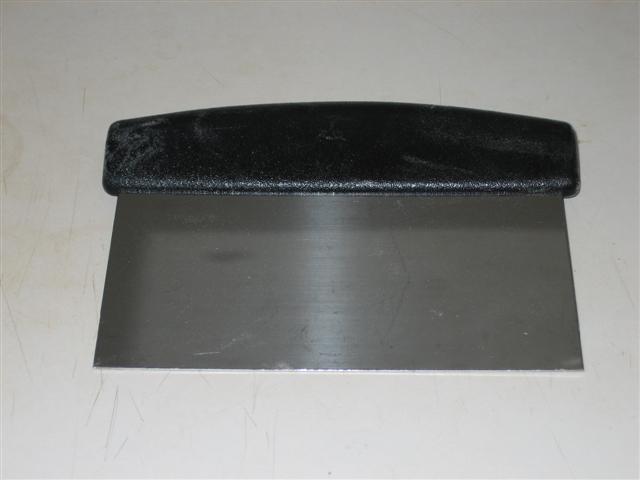
You will need a "baker scraper" which is a steel thing with a super blunt edge so that you can scrape the dough off a flat surface.


This bread is absolutely amazing. Here are some pictures of the CC's effort.


November 8, 2006 New York Times
Recipe: No-Knead Bread

Adapted from Jim Lahey, Sullivan Street Bakery
Time: About 1 1/2 hours plus 14 to 20 hours' rising

3 cups all-purpose or bread flour, more for dusting
1/4 teaspoon instant yeast
1 1/4 teaspoons salt
Cornmeal or wheat bran as needed.

1. In a large bowl combine flour, yeast and salt. Add 1 1/2 cups water, and stir until blended; dough will be shaggy and sticky. Cover bowl with plastic wrap. Let dough rest at least 12 hours, preferably about 18, at warm room temperature, about 70 degrees.

2. Dough is ready when its surface is dotted with bubbles. Lightly flour a work surface and place dough on it; sprinkle it with a little more flour and fold it over on itself once or twice. Cover loosely with plastic wrap and let rest about 15 minutes.

3. Using just enough flour to keep dough from sticking to work surface or to your fingers, gently and quickly shape dough into a ball. Generously coat a cotton towel (not terry cloth) with flour, wheat bran or cornmeal; put dough seam side down on towel and dust with more flour, bran or cornmeal. Cover with another cotton towel and let rise for about 2 hours. When it is ready, dough will be more than double in size and will not readily spring back when poked with a finger.

4. At least a half-hour before dough is ready, heat oven to 450 degrees. Put a 6- to 8-quart heavy covered pot (cast iron, enamel, Pyrex or ceramic) in oven as it heats. When dough is ready, carefully remove pot from oven. Slide your hand under towel and turn dough over into pot, seam side up; it may look like a mess, but that is O.K. Shake pan once or twice if dough is unevenly distributed; it will straighten out as it bakes. Cover with lid and bake 30 minutes, then remove lid and bake another 15 to 30 minutes, until loaf is beautifully browned. Cool on a rack.

Yield: One 1 1/2-pound loaf.